Happy New Year 2025!
Wishing you bug-free code and smooth API Mocking with MockMaster!

Developing a modern web application often involves creating and integrating with APIs. However, frontend teams frequently face challenges when the backend isn’t ready yet. This delay can stall development and testing, slowing down the entire project. Services like MockMaster provide an efficient solution by allowing you to mock APIs and simulate backend responses. This approach empowers developers to test and refine their applications without waiting for the backend to be complete.
In this article, we’ll explore strategies for effective API testing using API mocking, complete with code examples and practical insights.
API mocking involves creating fake endpoints that mimic the behavior of real APIs. These mock APIs return predefined responses based on specific inputs, enabling you to test various scenarios and workflows in your application.
Tools like MockMaster simplify this process by providing an intuitive interface to create and manage mock APIs, along with features such as response delays, dynamic parameters, and more.
MockMaster is a versatile tool for mocking REST APIs. Let’s walk through a simple example. Suppose you’re building a dashboard that fetches a list of users from an API.
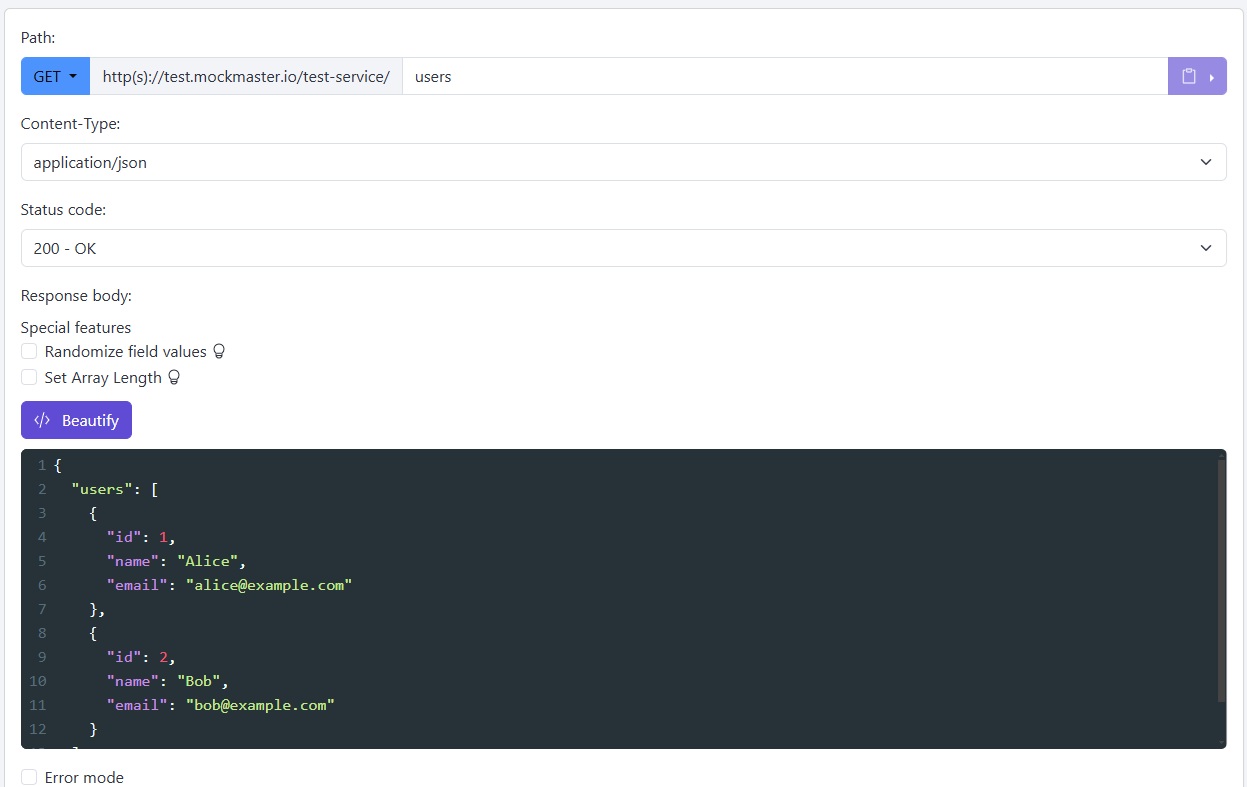
Log in to MockMaster and create a new mock endpoint:

Once the endpoint is created, you’ll receive a URL like https://your-username.mockmaster.io/application-name/users. Test it using a tool like Postman or curl:
curl -i -X GET "https://thoughtful87167.mockmaster.io/test-service/users" -H "Content-Type: application/json" --data-raw ''
Response:
{
  "users": [
    { "id": 1, "name": "Alice", "email": "[email protected]" },
    { "id": 2, "name": "Bob", "email": "[email protected]" }
  ]
}
In a frontend application, you can integrate the mock endpoint just as you would a real API. Below is an Angular example:
import { HttpClient } from '@angular/common/http';
import { Component, OnInit } from '@angular/core';


@Component({
  selector: 'app-user-list',
  template: `
    <ul>
      <li *ngFor="let user of users">
        {{ user.name }} ({{ user.email }})
      </li>
    </ul>
  `,
})
export class UserListComponent implements OnInit {
  users: any[] = [];


  constructor(private http: HttpClient) {}


  ngOnInit() {
    this.http.get('https://thoughtful87167.mockmaster.io/test-service/users').subscribe((data: any) => {
      this.users = data.users;
    });
  }
}
Replace the mock URL with the real API URL once the backend is ready.
Testing how your application handles timeouts and slow network conditions is crucial for ensuring a smooth user experience. MockMaster allows you to simulate response delays, making it easier to test such scenarios.
While setting up a mock endpoint, you can specify a response delay (e.g., 5 seconds).

Here’s an example of handling a timeout in an Angular application:
this.http
  .get('https://thoughtful87167.mockmaster.io/test-service/users', { observe: 'response', responseType: 'json' })
  .pipe(timeout(5000)) // Set a 5-second timeout
  .subscribe({
    next: (response) => console.log('Response:', response.body),
    error: (err) => {
      if (err.name === 'TimeoutError') {
        console.error('Request timed out. Please try again.');
      } else {
        console.error('Error:', err.message);
      }
    },
  });
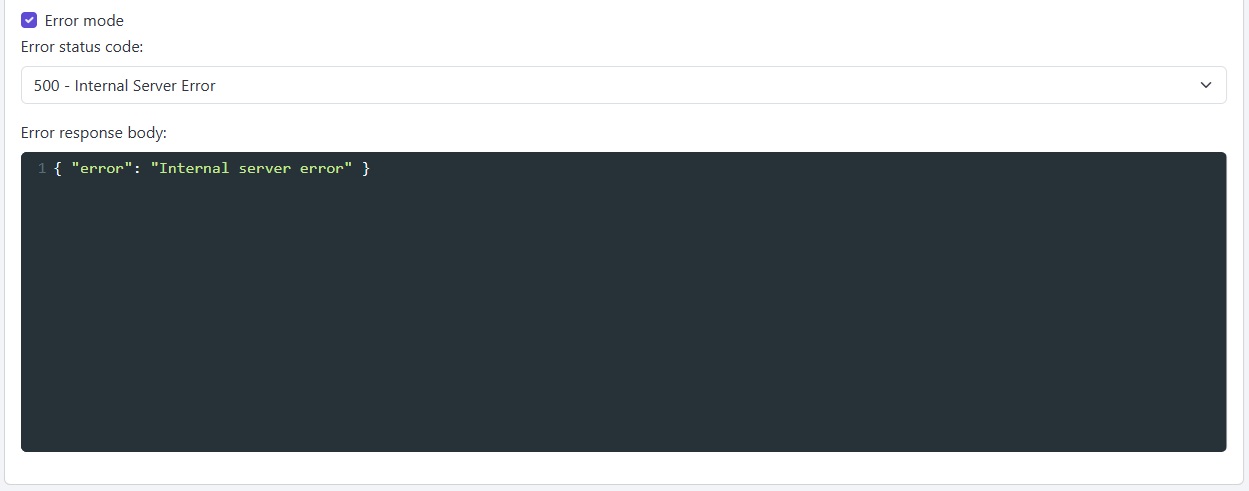
Testing error handling is equally important. MockMaster allows you to configure responses with different status codes.

Request:
curl -i -X GET "https://thoughtful87167.mockmaster.io/test-service/users" -H "Content-Type: application/json" --data-raw ''
Response:
{ "error": "Internal server error" }
When the backend is ready, switch from the mock endpoint to the actual API. Test thoroughly to ensure consistency in behavior. Mocks should have already caught most issues, so this transition should be smooth.
API mocking is a powerful technique for accelerating development and testing cycles. With tools like MockMaster, teams can simulate complex backend logic, test edge cases, and maintain productivity even when the backend is delayed. Whether you’re working on a small project or a large-scale application, leveraging API mocking can significantly enhance your workflow.
Try out MockMaster today and experience seamless API testing!
Happy coding!